
Lift pits sit at the lowest point of a building, so they’re the first place groundwater finds. In many projects, especially existing buildings, tight urban sites, and basements built right up to the boundary, you simply can’t dig around the outside to apply a conventional external membrane. Internal waterproofing is the practical answer in these situations.
Why external access is often impossible
- Boundary constraints: The pit wall may sit directly against a neighbouring property, a retaining wall, or a public road.
- Existing structures: Excavating beside a completed building risks undermining foundations and adjacent services.
- Depth and groundwater: Deep pits below the water table make excavation expensive, dangerous, and often needing dewatering and shoring.
- Cost and disruption: Digging out and reinstating landscaping, paving, or car parks rarely makes sense for a leak repair.
Why internal systems work
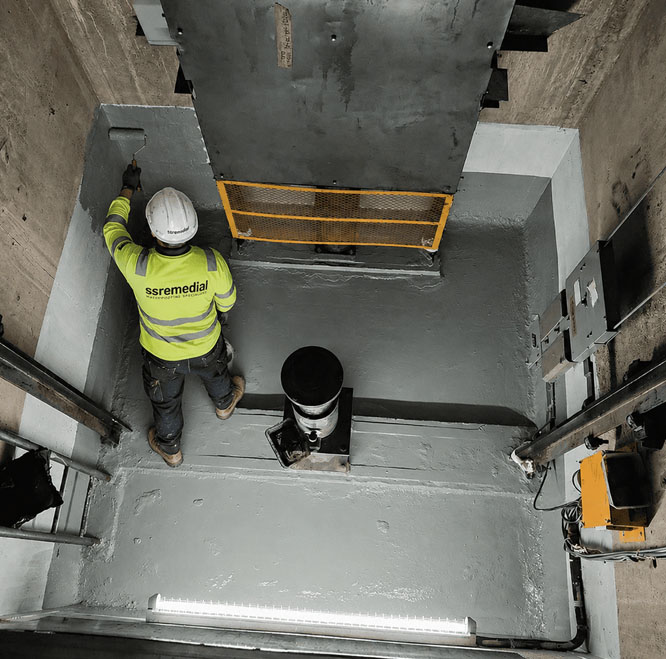
1. They treat the problem from the inside. Cementitious crystalline coatings, slurries, and epoxy or polyurethane injection resins are applied directly to the pit’s interior faces, with no excavation needed.
2. Crystalline technology penetrates the concrete. These products react with moisture and free lime in the concrete to form insoluble crystals within the pores and micro-cracks. They can block water moving through the structure even under negative-side pressure (water pushing from outside toward the interior).
3. Injection grouting seals active leaks. Cracks, cold joints, and service penetrations can be sealed with polyurethane (for flowing water) or epoxy (for structural bonding) without touching the exterior.
4. Cavity drain membranes manage rather than fight water. Where seepage can’t be fully stopped, a studded drainage membrane channels water to a sump or pump, relieving hydrostatic pressure.
5. Faster, cleaner, lower-risk. Work is confined to the pit, usually completes in days, and avoids heavy plant, shoring, and neighbour disputes.
Typical internal approach
- Diagnose the leak source: cracks, joints, honeycombing, or penetrations.
- Prepare the substrate: remove laitance, open and chase cracks, clean thoroughly.
- Stop active flows with hydraulic cement or injection grout.
- Apply a crystalline slurry or coating system, often in two coats.
- Detail the floor-wall junction, sump, and lift guide-rail fixings carefully.
- Cure and test before the lift equipment is installed or reinstated.
Limitations to keep in mind
- Internal systems work against negative-side pressure, so the structure itself must be sound. Severe structural cracking may need repair first.
- Very high hydrostatic pressure may call for a combination of injection, coating, and drainage plus a reliable sump pump.
- Surface preparation quality largely determines success.
- External membranes remain the better choice for new builds where access exists, since they stop water before it reaches the concrete.
Bottom line
When you can’t get to the outside of a lift pit, internal waterproofing isn’t a compromise; it’s the proven, cost-effective way to protect the pit, the lift machinery, and the building. A combination approach (crack injection, crystalline coating, and controlled drainage) gives the most dependable long-term result.
If you’d like, I can adapt this into a blog post, a client-facing explainer, or a product-focused page with a specific tone or length.
Trust S&S Remedial for Expert Lift Pit Waterproofing Solutions
At S&S Remedial we specialise in tailored waterproofing solutions designed to protect your assets and ensure uninterrupted functionality.
From elevator shaft waterproofing to drainage solutions, our team is here to help.
Contact us today for a reliable and lasting fix!