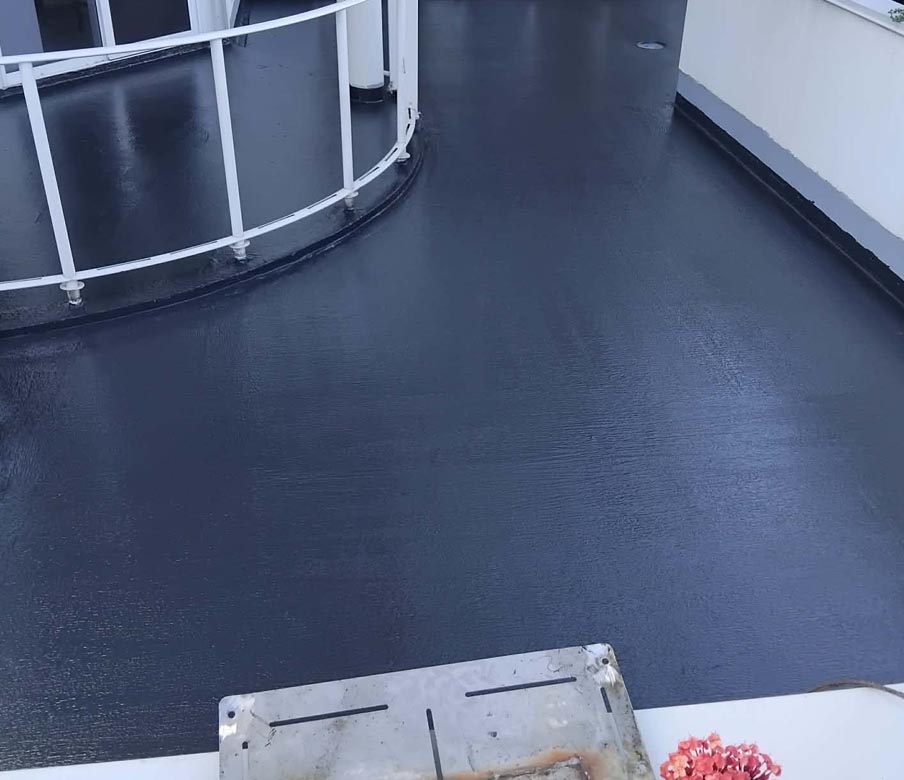

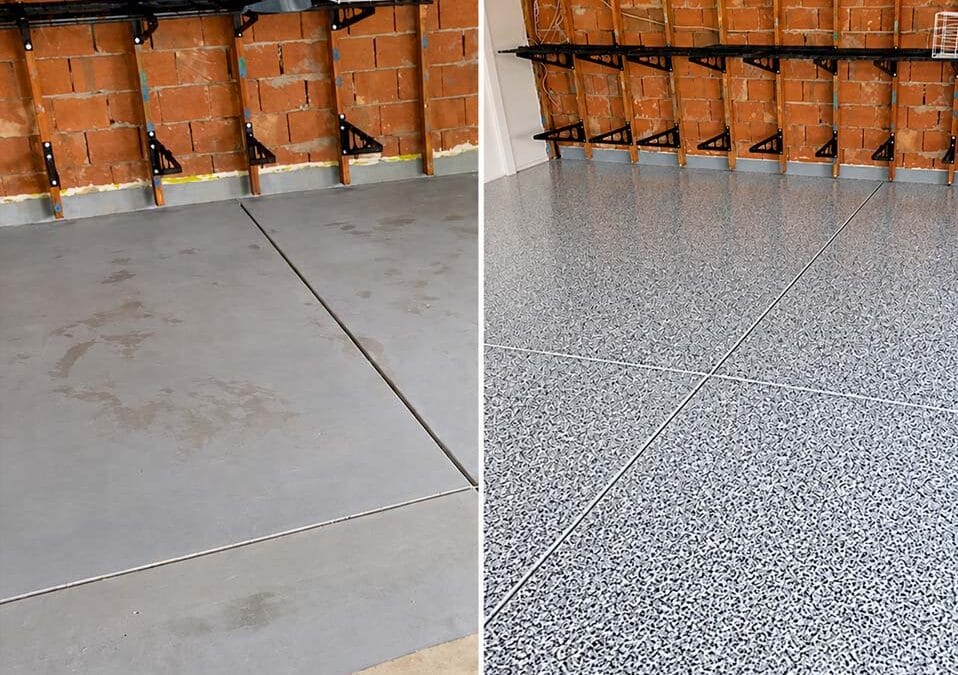
Rising damp in a Bonogin garage slab: grinding, Hydropoxy negative-side membrane, polyurethane injection to a leaking rear wall and a flake epoxy floor finish
This Bonogin garage had been set up as a home gym and storage area, but the floor was not behaving like a dry internal floor. The concrete was stained and patchy, with a hairline crack running across the middle, and the base of the rear wall had a gap at the junction with the slab, with water coming through from behind it.
The cause was rising damp. Ground moisture was travelling up through the concrete slab from the soil beneath, and that constant movement of water produced the staining, the efflorescence (the white salty crust left behind as water passes through concrete and masonry) and the delamination, meaning the top skin of the slab loses its grip and starts breaking away. Any paint or coating laid over a slab in that condition will lift again, as the problem originates underneath.
The remedy was a full system rather than a single product. We ground the slab back, applied a negative-side epoxy waterproofing membrane to hold the moisture back, sealed the active water entry at the rear wall with polyurethane grout injection and a reinforced cove, then finished the floor with a trafficable epoxy coating and a flake anti-slip topcoat. The result is a sealed, seamless floor the owner is able to use again.
What the owner was seeing: staining, salt crust and a floor that never dried out
The first signs of rising damp are rarely dramatic. On this job the concrete floor carried uneven staining and patchy discolouration, the sort of marking that looks like a spill that never lifted, plus a hairline crack across the middle of the slab. At the rear, the bottom courses of brickwork carried efflorescence and moisture-related deterioration, and the slab surface at that point stayed dark and damp.
For a home owner, the practical symptoms are simple: stored items go musty, cardboard boxes soften at the base, rubber gym matting traps moisture underneath, and any painted or sealed surface starts to bubble and flake. With the garage in use as a gym and storage space rather than just parking, a permanently damp floor was not something to live with.
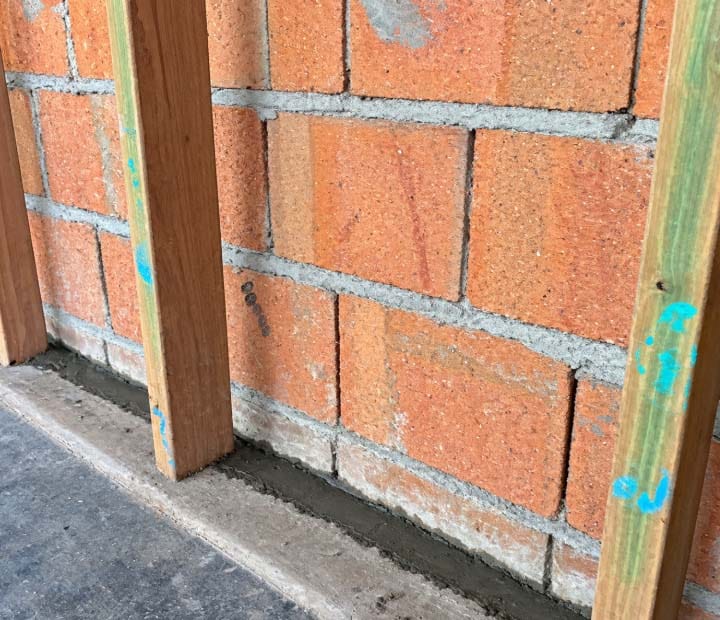
Efflorescence and moisture damage on the bottom courses of the rear brick wall, the white salty crust left behind by ground moisture, with fresh mortar packed into the wall to floor junction.
The cause: rising damp moving up through the concrete slab
Concrete is not waterproof. It is porous, meaning it behaves a bit like a very dense sponge, and moisture in the ground beneath a slab travels upwards through these tiny pores and any cracks. That process is called rising damp. At the surface the water evaporates, but the dissolved mineral salts carried up with it are not able toevaporate, so they stay on and just under the surface. These salts form the white efflorescence, and as they crystallise they push the top layer of the slab apart from the concrete below, which is the delamination that made the floor patchy and weak.
The rear wall added a second, separate path for water. A gap or separation had opened at the wall to floor junction and water was entering from the negative side, meaning the back face of the wall, the side with no access. Identifying both of these before starting mattered, since treating the slab alone would have left the wall still wetting the floor at the perimeter. In the photo beside this section, the stripped rear brickwork and the bare cracked concrete in the foreground set out exactly what we were working with once the linings and shelving came off.
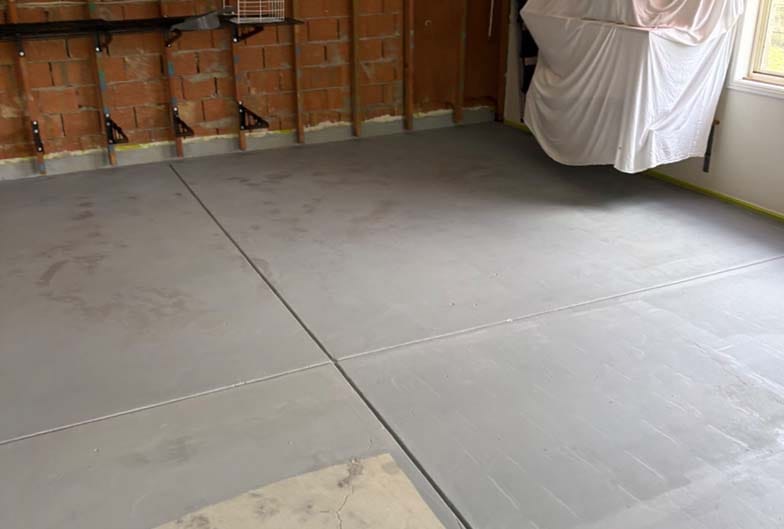
Most of the floor now coated, while the uncoated patch in the foreground reveals the raw, cracked concrete
underneath and the stripped rear brickwork with injection ports fitted
First stage: grinding approximately 38 square metres of slab back to sound concrete
No coating bonds to a contaminated or delaminating surface. We mechanically ground the full working area of the floor, approximately 38 square metres, using vacuum-shrouded grinders to keep dust down inside the building. Grinding achieves three things at once. It removes surface contamination and staining, it takes off the weak top layer that the salts had already lifted, and it opens up the pores of the concrete so the waterproofing membrane keys into the substrate (the surface underneath) rather than simply sitting on top of it.
Grinding is also the diagnostic stage. Once the slab is cut back, the true condition of the concrete is visible, including the extent of any cracking. On this job the slab was sound and suitable for coating, so we moved straight on to the waterproofing.
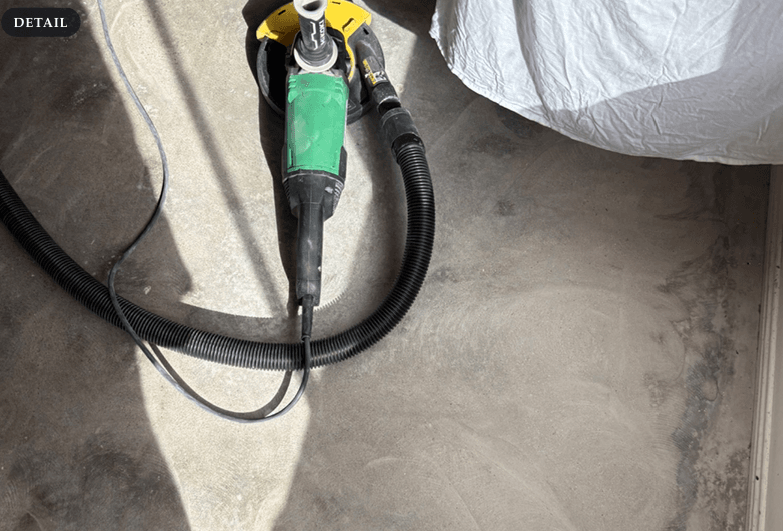
The concrete slab being mechanically ground with a vacuum-shrouded grinder to strip staining and the weak top
layer so the waterproofing bonds to sound concrete
Negative-side waterproofing: a two-part epoxy membrane holding the moisture back
Standard practice is to waterproof the wet side of a structure, so on a slab that would mean under the concrete, against the ground. That option is not available in a finished house. Negative-side waterproofing is the alternative: the barrier is applied to the dry, inside face, and it is designed to resist moisture pushing against it from behind.
We applied Hydropoxy Membrane, a two-part epoxy waterproofing coating, across the prepared floor, approximately 38 square metres. Two-part means the resin and hardener are mixed on site and cure by chemical reaction into a dense, continuous film rather than simply drying. Over properly ground concrete it forms a moisture barrier across the whole slab, so the ground moisture driving the rising damp no longer reaches the surface, carries salts with it or breaks down the finish laid over the top. The membrane was taken right out to the door thresholds and edges, leaving no untreated strip for moisture to find.
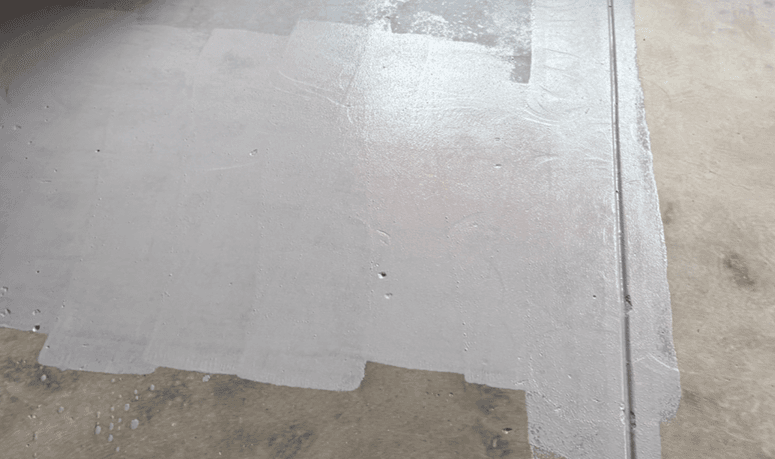
The first coat of epoxy waterproofing membrane going down over the prepared slab, with bare concrete still visible alongside and the joint on the right also coated.
Sealing the leaking rear wall with polyurethane grout injection and a fibre-reinforced cove
The rear wall needed its own treatment. We carried out polyurethane grout injection along approximately 8 metres of the wall. Injection ports are fitted into the wall and a polyurethane resin is pumped through them under pressure. On contact with the water sitting in the gap or crack, the resin expands and cures into a flexible seal, filling the void from the inside and cutting off the active leak at the point of entry.
We then formed a fibre-reinforced cove along approximately 4 metres of the floor to wall junction at the rear wall. A cove is a 45 degree mortar fillet, a triangular fillet that rounds off the sharp internal corner at the meeting of floor and wall. That corner is the weakest point in any floor waterproofing system, as a coating has to turn a hard right angle at that spot and is prone to thinning or splitting. The fibre reinforcement in the mortar gives the fillet strength, and the rounded profile lets the membrane run continuously from the floor up into the wall junction without a break.
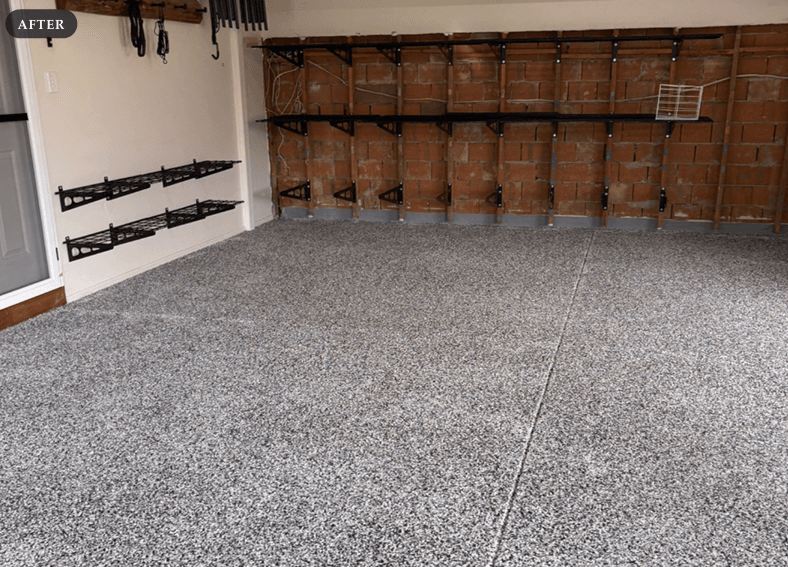
The completed flake floor with the rear wall stripped back to bare brick and grey waterproofing material installed at the base of the wall.
The finished surface: trafficable epoxy base coat with a flake anti-slip topcoat
Once the waterproofing had cured, we applied the Epoxy Floor Coating Base System across the floor, approximately 38 square metres. This is a two-pack epoxy, meaning a primer followed by pigmented build coats, producing a seamless, hard wearing, trafficable surface with no joints or grout lines for dirt and moisture to sit in.
Over that base we applied the flake and anti-slip finish, again across approximately 38 square metres. Decorative flake is broadcast into the wet coating, then sealed under a clear topcoat. As well as giving the floor its speckled appearance, the flake adds texture, so the surface keeps grip underfoot rather than turning slippery under a damp shoe or gym mat. Epoxy coatings need time to cure, and the floor is not to be walked on or driven on during application and curing, so the space was out of use for that period.
The result: a dry, sealed garage floor back in use
The garage now has a clean, uniform flake epoxy floor across the full area, coved at the perimeter, with the rear wall leak sealed and the rising damp held back by the epoxy membrane underneath the finish. No staining, no salt crust and no soft, delaminating surface remains for the owner to manage.
Just as importantly, the finish should stay put. Coatings fail on damp slabs for one main reason: moisture keeps pushing from below until the bond breaks. By grinding back to sound concrete, treating the rising damp with negative-side waterproofing and stopping the separate water entry at the rear wall before any decorative coating went down, the finished floor sits on a dry, properly prepared base. The space returns to service as a usable home gym and storage area rather than a damp room the owner works around.
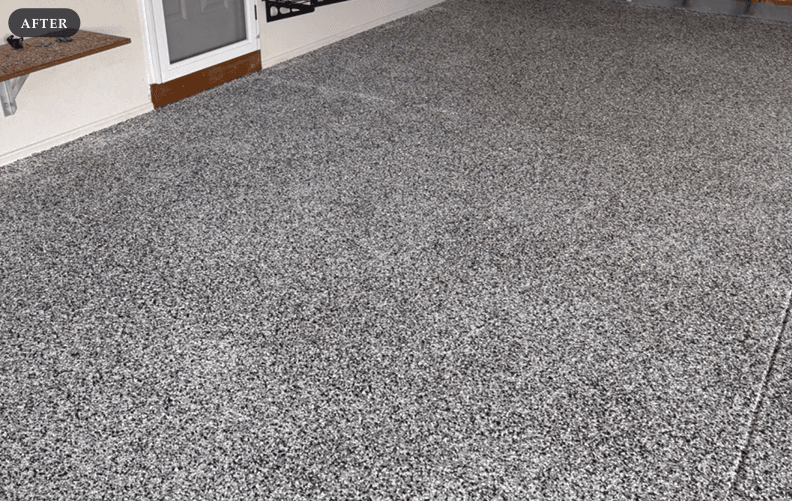
The completed garage floor, uniform and defect free, with the grey waterproofing coat visible on the lower brickwork at the perimeter.
Common questions
Is painting or coating straight over a damp garage floor an option?
Not with a lasting result. With ground moisture still rising through the slab, it pushes against the underside of any coating and eventually breaks the bond, so the finish bubbles, lifts and peels. That is the reason this job was staged: grind the slab back to sound concrete, apply a negative-side epoxy waterproofing membrane to hold the moisture back, and only then lay the epoxy base and flake finish on top.
What is negative-side waterproofing, and what made it the right choice here?
Negative-side waterproofing means the barrier is applied to the dry, accessible face of the structure rather than the side the water arrives from. On an existing house, access under the slab to waterproof against the ground is not available, so the membrane goes on top, on the inside face, designed to resist moisture pushing against it from behind. On this job that was the Hydropoxy two-part epoxy membrane applied across the prepared floor.
What makes polyurethane grout injection seal a leaking wall?
Injection ports are installed along the wall and polyurethane resin is pumped through them under pressure into the gap or crack. On contact with water the resin expands and cures into a flexible seal, filling the void and cutting off the path the water was using. On this garage the concrete resin injection ran along approximately 8 metres of the rear wall, at the point water was coming through from the back side.
Should the garage be emptied before the crew arrives?
It should. Clear, unobstructed access to the full floor and the rear wall is required for the duration of the works, so all stored items, gym equipment, weights, bikes, tubs and furniture need removing beforehand. SSR is not able to move or store a customer’s belongings as part of the works.
What length of time is the garage out of use?
The membrane waterproofing and the epoxy coatings both cure by chemical reaction, and the floor is not to be walked on or driven on during that period. Cure times depend on the products and the conditions on the day, so our crew advises the specific times on site. Adequate ventilation is also needed during application of the epoxy and membrane products.
If your garage, basement or ground floor slab is staining, shedding its surface or leaving a white salty crust along the bottom of the walls, that is moisture moving through the concrete, and it will not settle on its own. Get in touch with S&S Remedial Services for an on-site assessment. Our waterproofing specialist will identify the source of the water and set out the works needed to treat it properly before any new floor finish goes down.